Setup & Configuration:
Track customer engagement across profit centers and individual registers
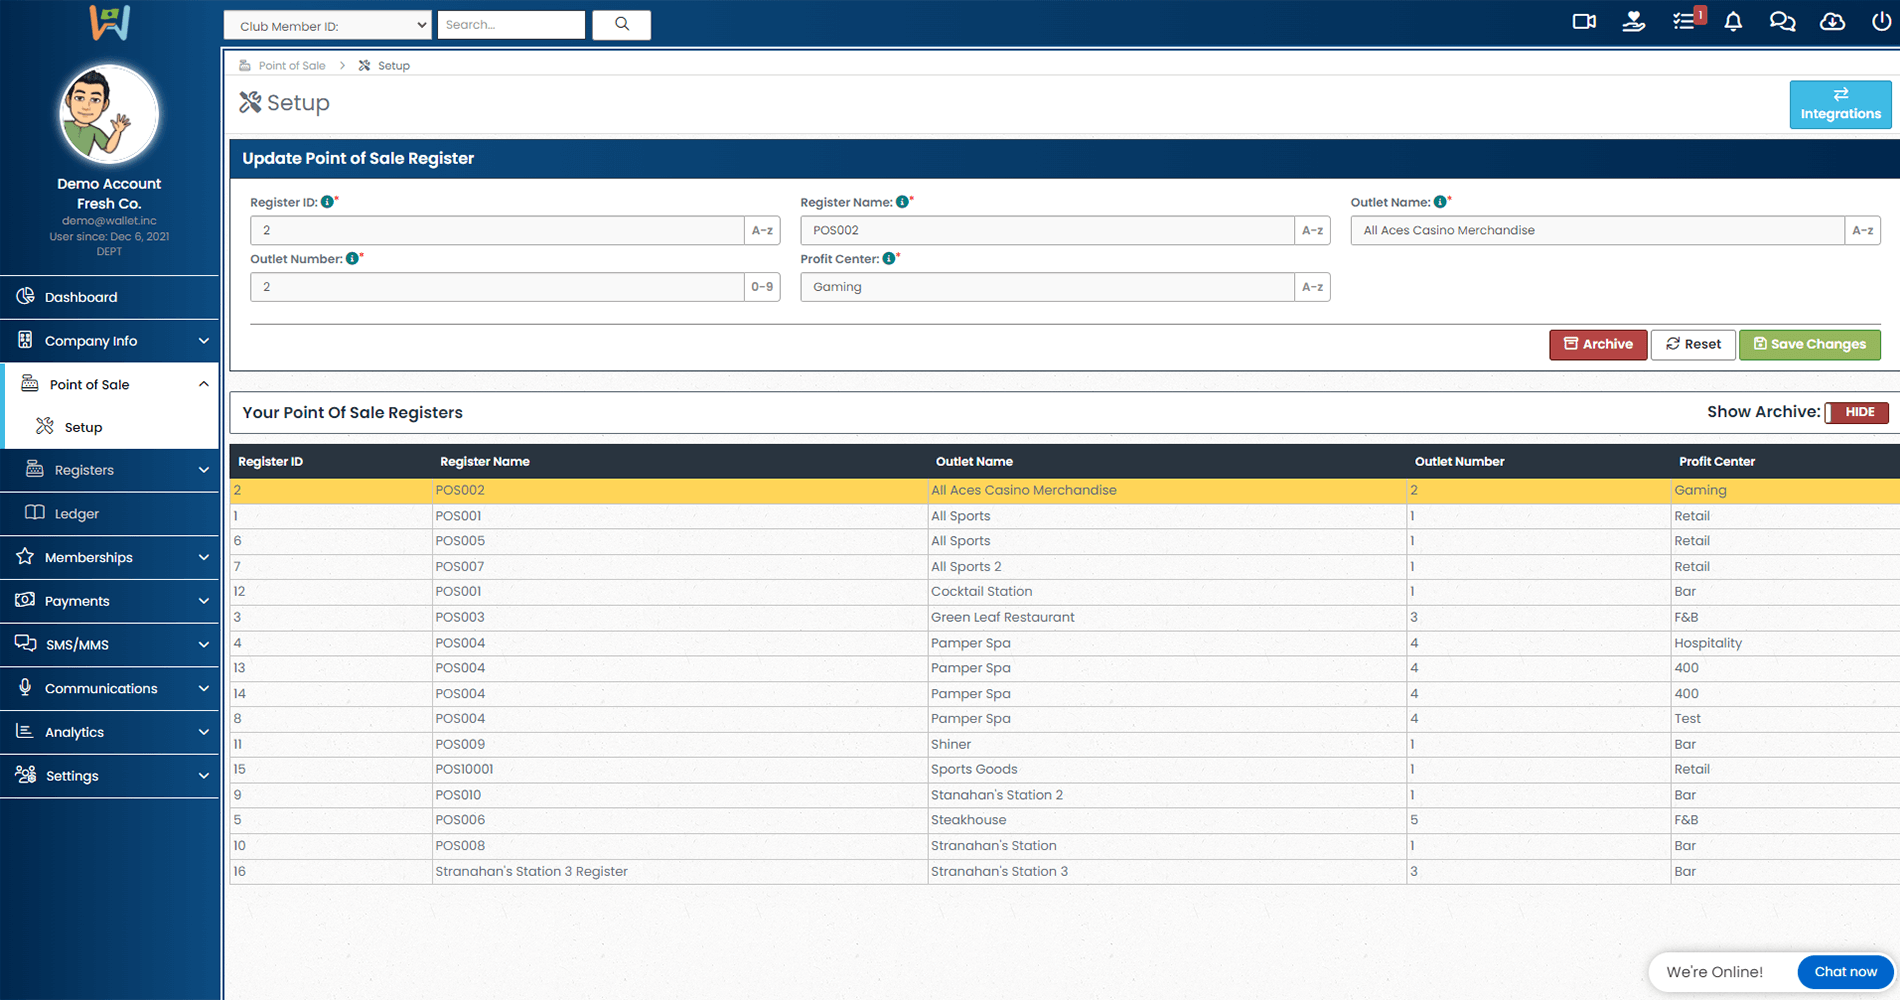
Your point-of-sale setup page is where you will go to setup your registers and profit centers. You can easily add and manage multiple profit centers if your business contains more than one. To set up your registers, you will provide each register with a unique ID and name. Each numerical ID will correlate with one unique register name.
Your first outlet name should reflect the name of your primary business. Any additional outlets that are setup should reflect any subsequent business that may be housed within your primary business.
For businesses that have multiple Profit centers, the outlet name should reflect that since there may be multiple outlet names that correlate with the same outlet number. In the profit center field, you will insert the type of profit center i.e. Bar, Restaurant, Retail, etc.
A best practice is to start with one profit center, add all the registers that operate in that profit center before moving onto another profit center.
PoS integration with Wallet Inc. is quick and easy
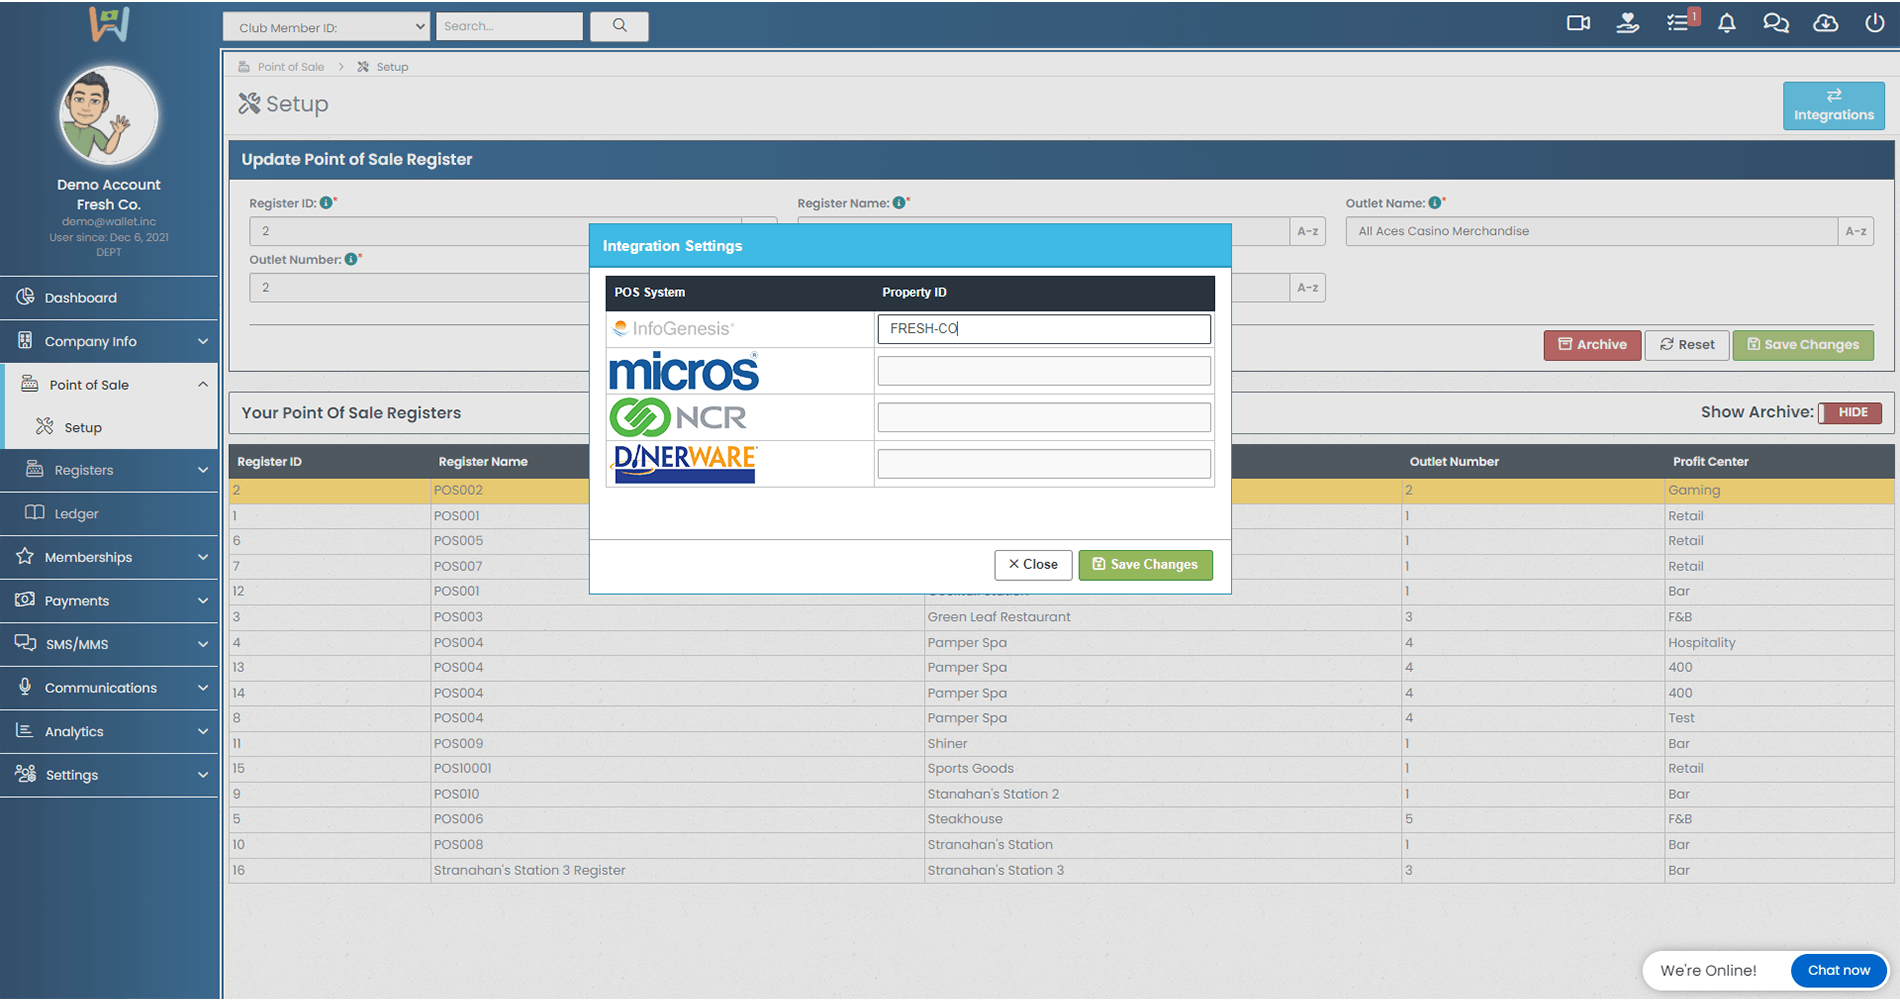
To start your integration of Wallet with your PoS provider, you will navigate to the "Point of Sale" tab, click "Setup" and then click Integrations in the upper right hand corner.
From there, you'll enter your property ID next to the appropriate PoS System Logo and click "Save Changes".
PoS-Specific Reports (e.g. InfoGenesis):
Reviewing and exporting POS Communications
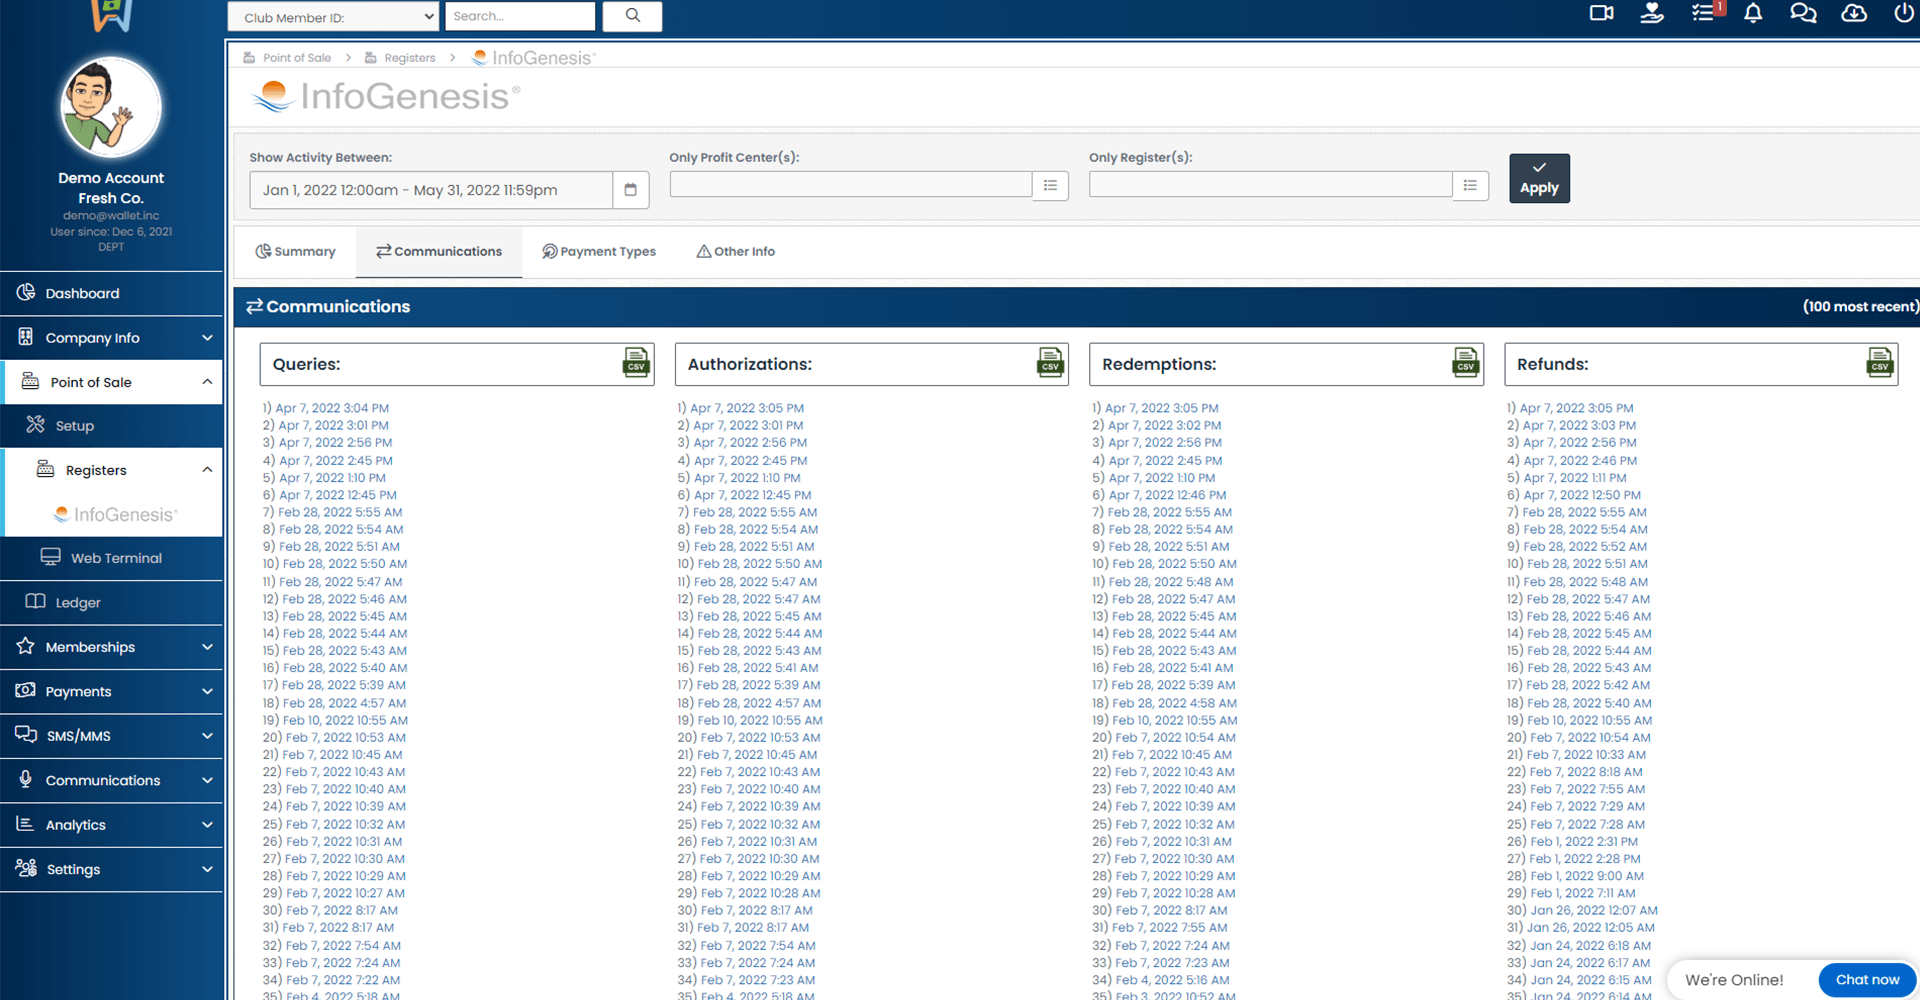
InfoGenesis users can find the communications sent and received by their POS systems here.
Start by selecting a timeframe that you wish to review by clicking on the date range below the "Show Activity Between" label and select a predefined option or choose your own custom time frame. If you'd like to narrow your search to a specific profit center(s) or specific register(s), you can do so in the same fashion used to select your desired date range. Once you've defined the variables you wish to include in your review, click apply.
With the variables that you wish to review applied, you can now review each query, authorization, redemption, or refund individually by clicking on a specific date and time, or you can compile all communications from one of those four categories into a single downloaded CSV file. To do this, simply click the CSV icon to the right of the category that you wish to compile.
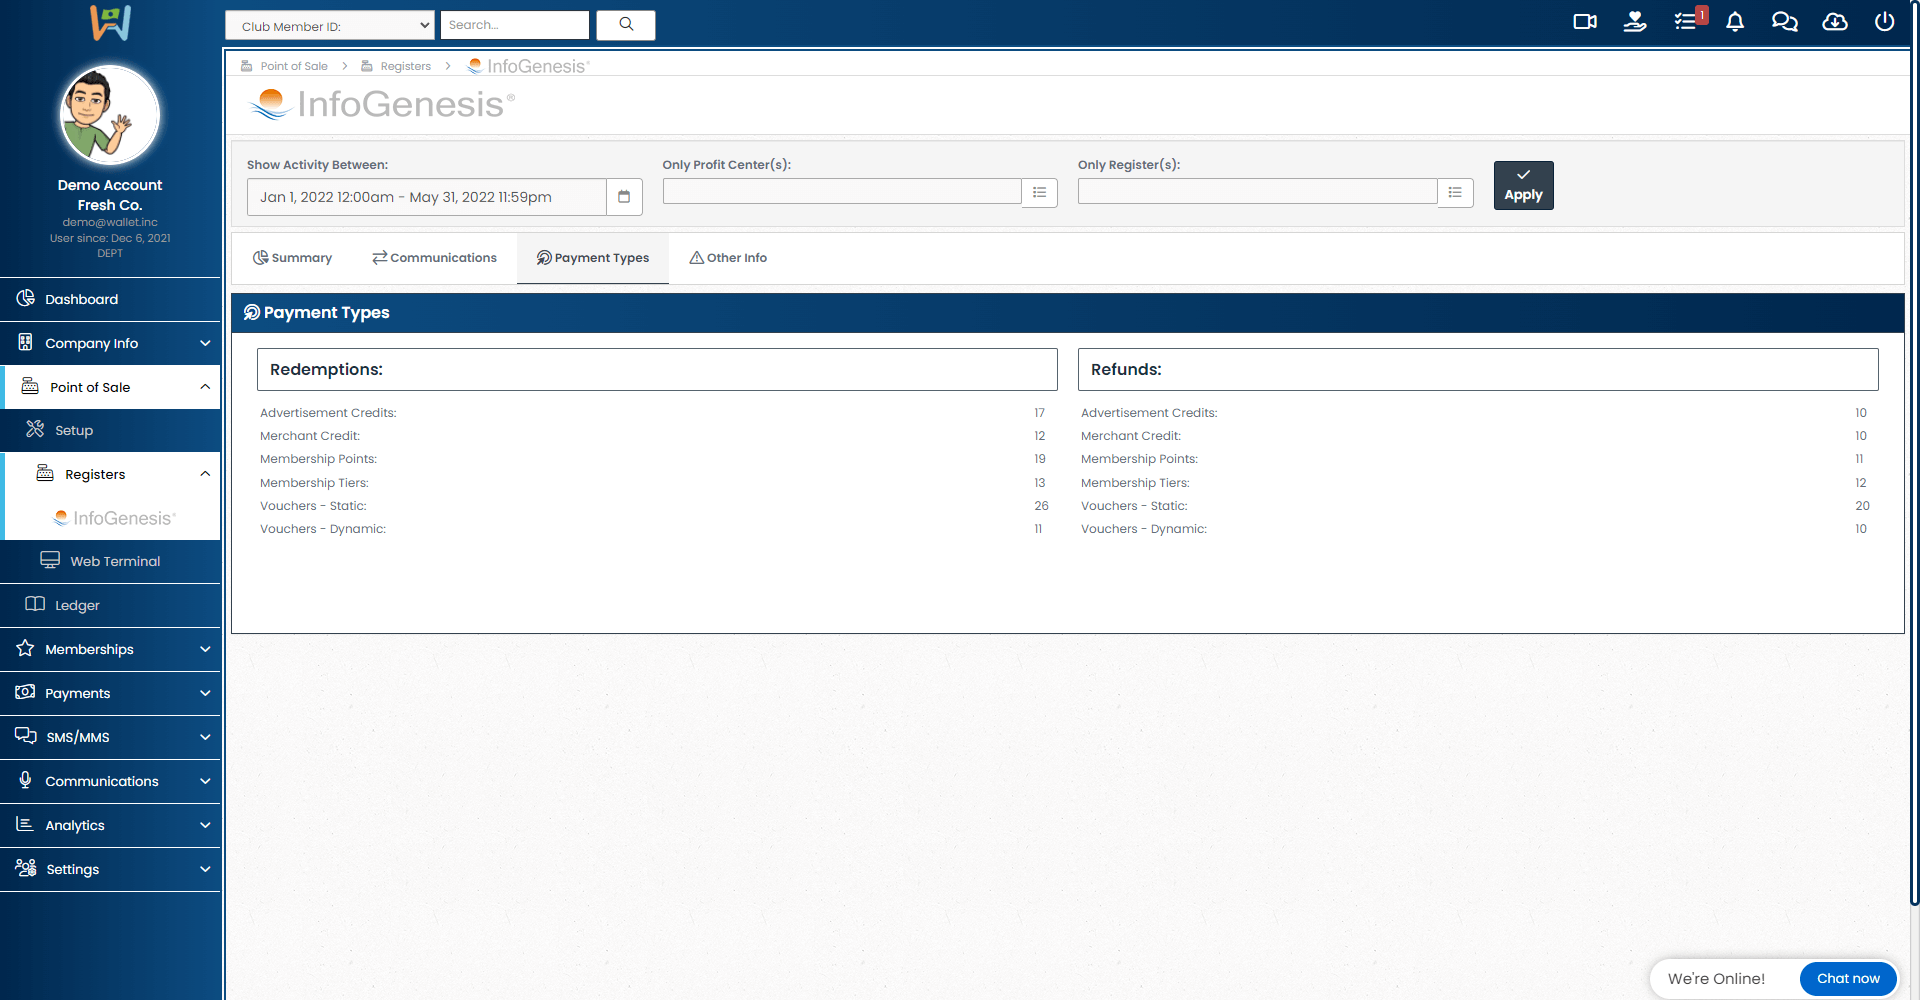
Review how many redemptions and refunds have occurred per payment tool
On the Payment type page, you can review how many redemptions and refunds have occurred in a selected date range for a specific profit center(s), and/or register(s).
To review these figures, select your time frame, profit center(s), and register(s) and click apply. The value for the selected variables will then display for both redemption and refunds for all payment types.
Reviewing and downloading additional information regarding failed queries
With large amounts of data, errors from your PoS are unfortunately going to occur.
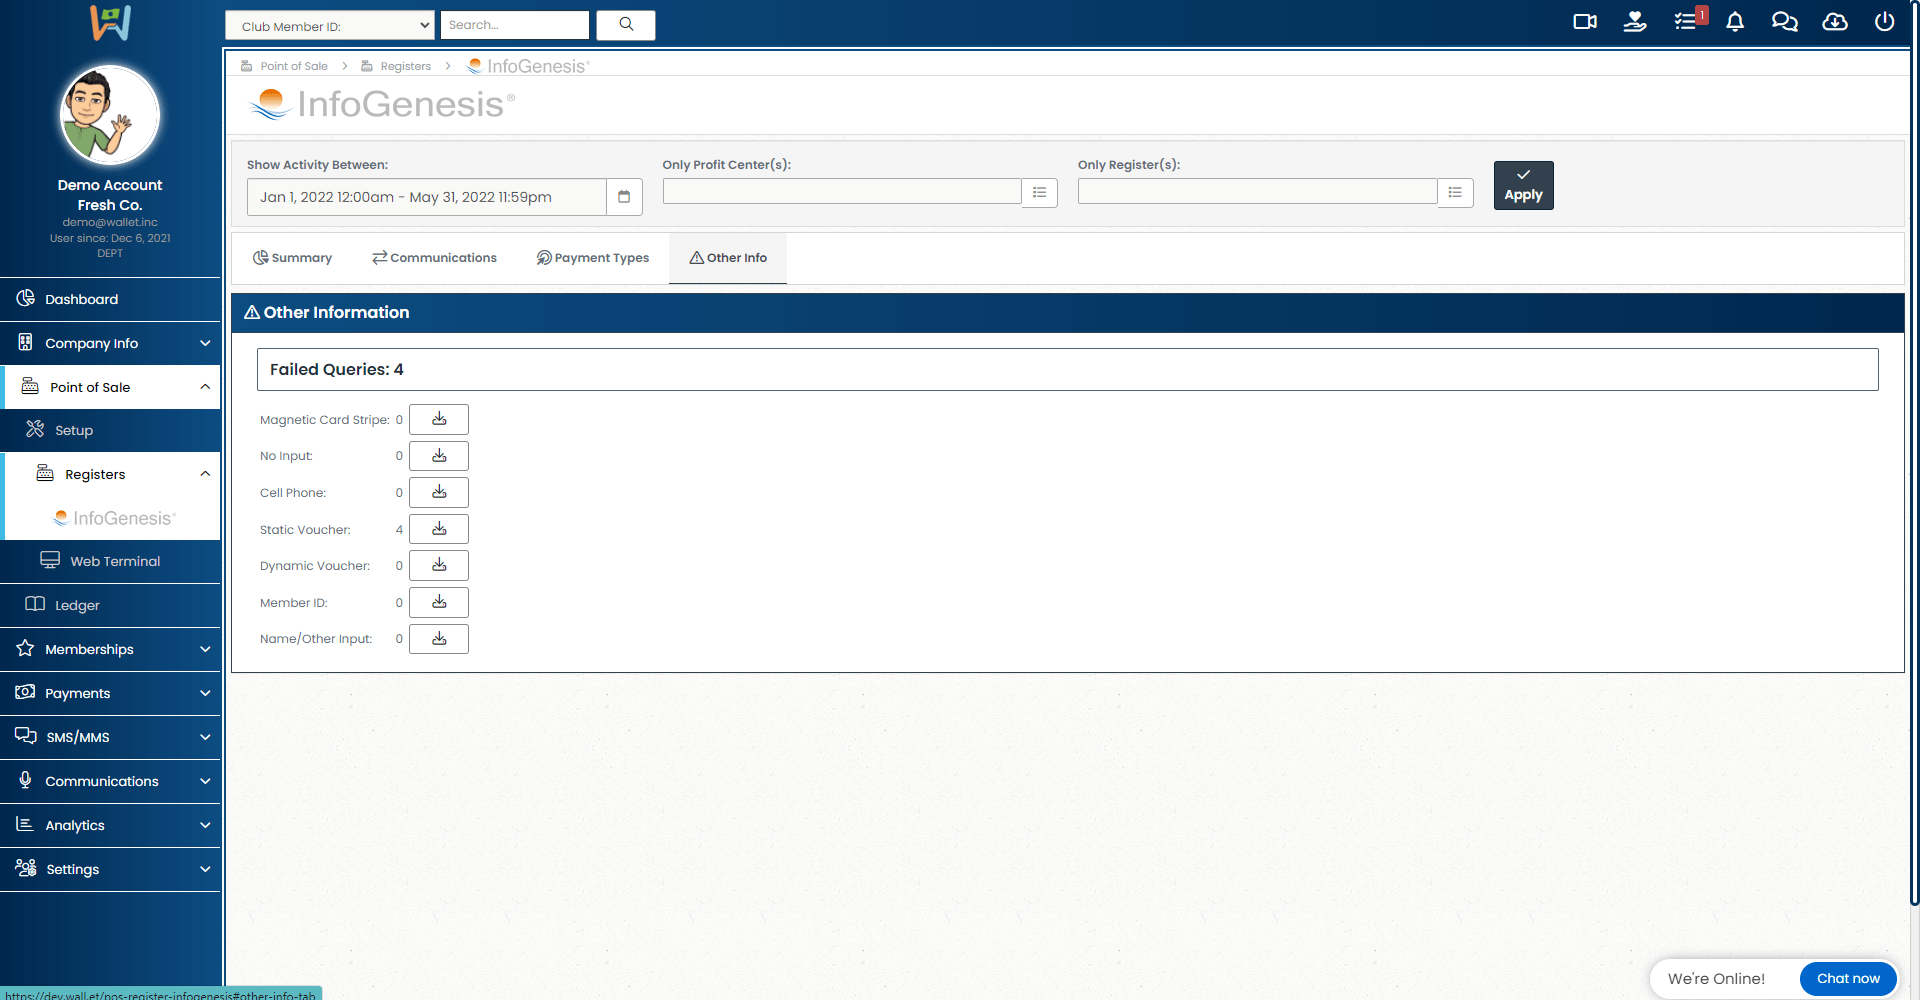
On the 'Other Info' page, you can track failed queries. Select a date range, profit center(s), and/or register(s), click apply. You will then see numbers for failed queries and what the source of the query was (e.g., Magnetic card stripe, cell phone, static vouchers, dynamic vouchers, etc.).
If you wish to download a report detailing failed queries, simply click the download icon adjacent to the category you wish to download.
Optional Web Terminal & Ledger:
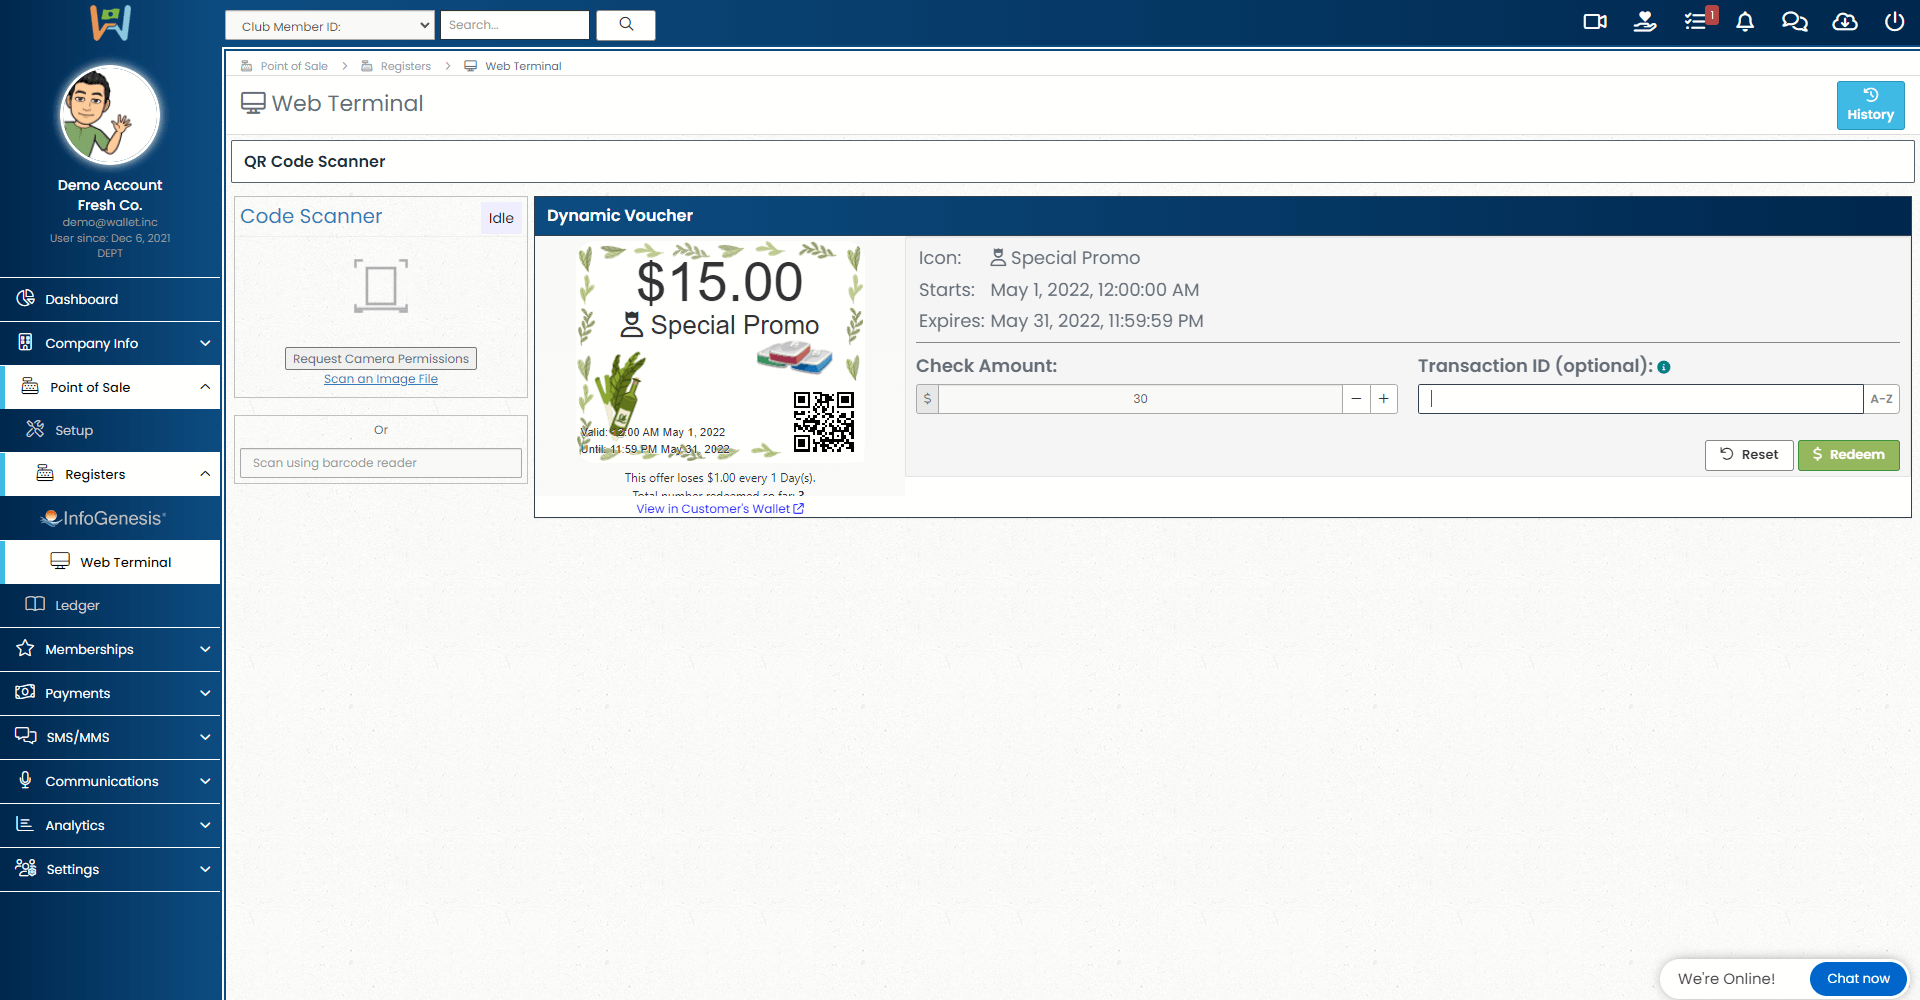
Scan and redeem offers from inside your Wallet with the Web Terminal
Your Web Terminal allows you to redeem offers right from within your company Wallet. Use the camera right on your smart device! You can add a unique transaction ID as you go to redeem.
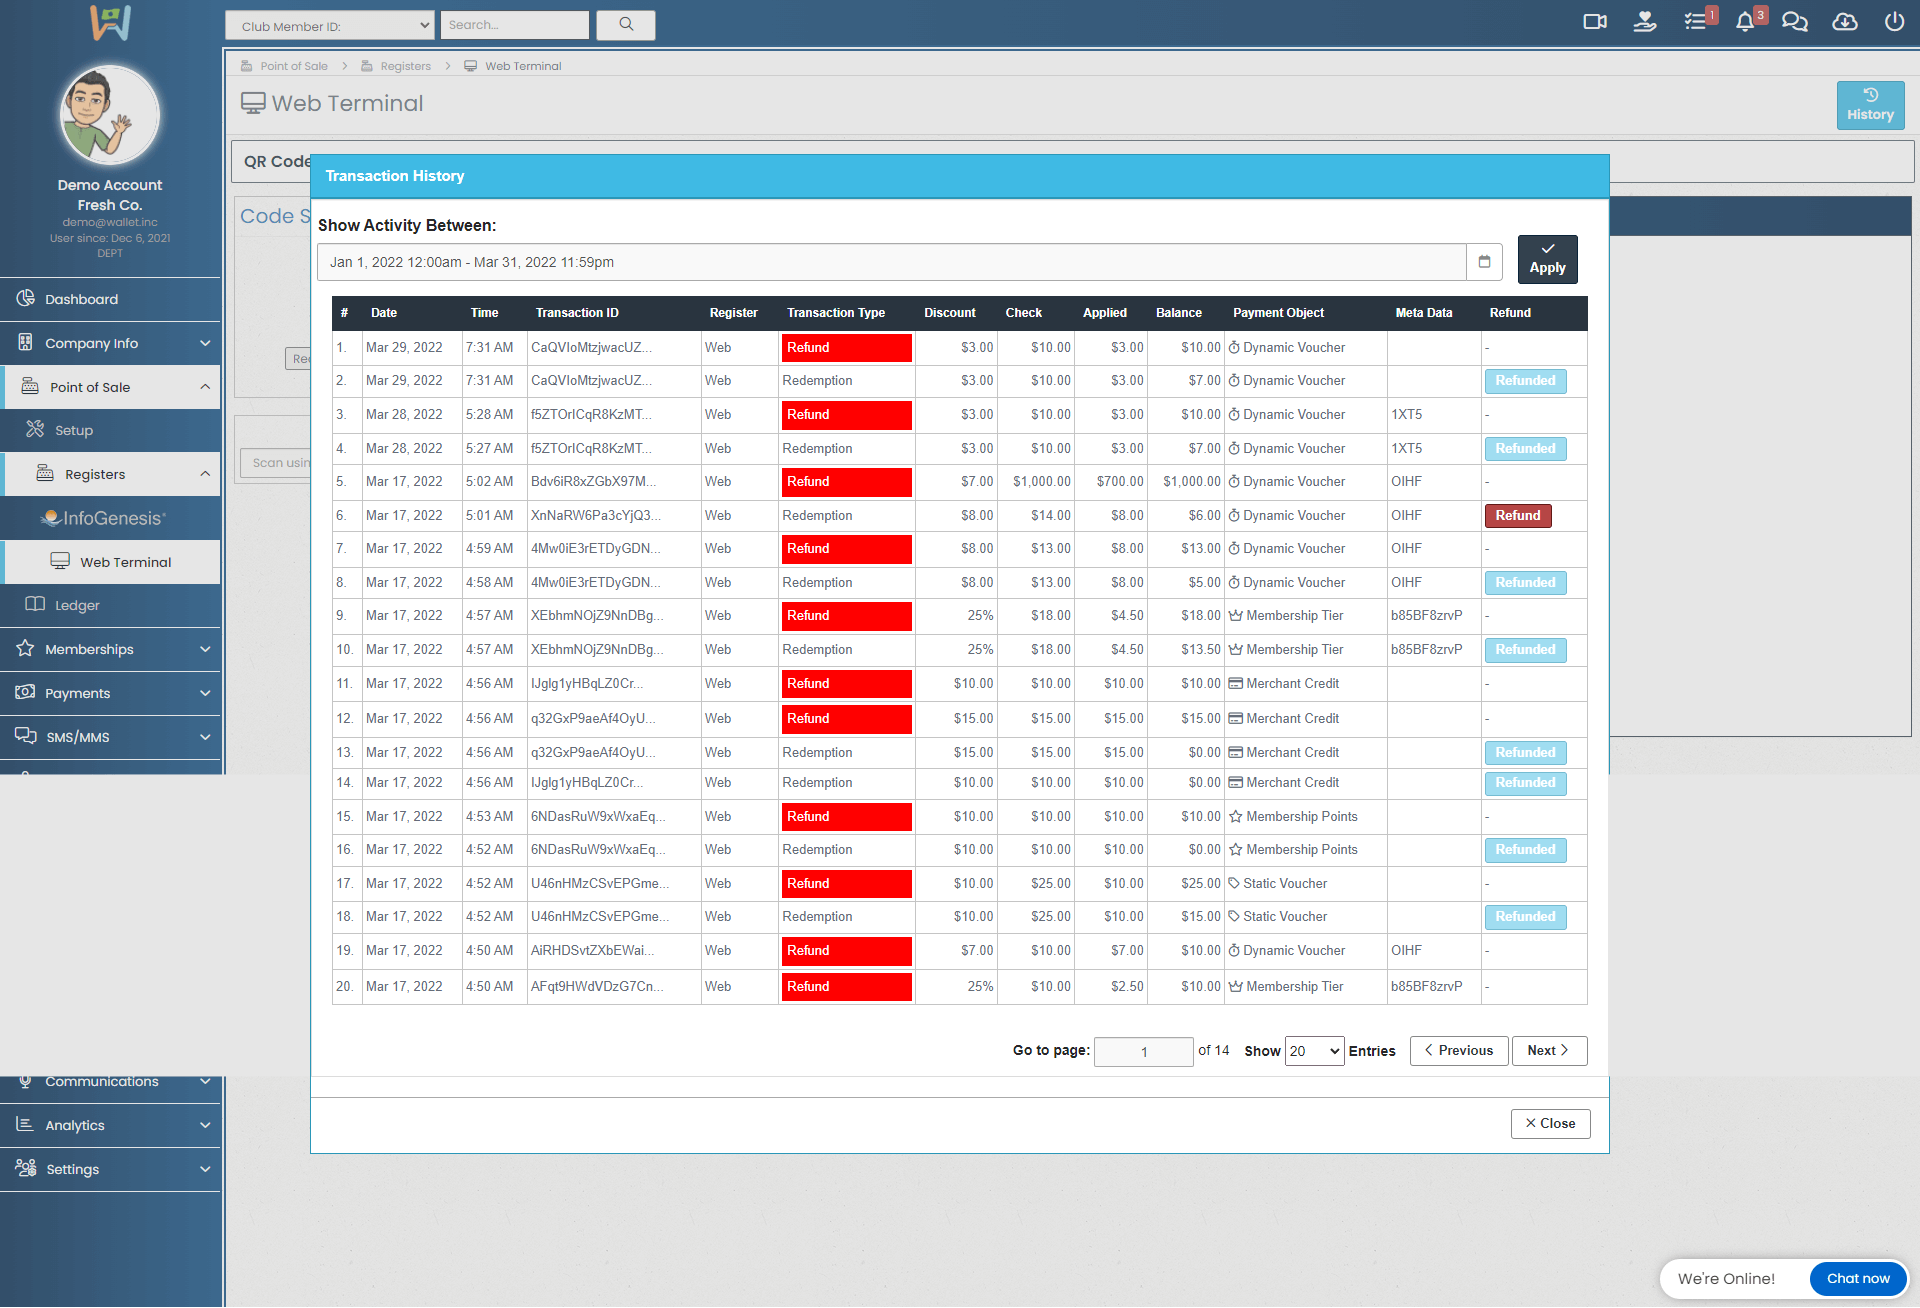
Keep track of your Web Terminal Redemptions and Refunds
Click on the "History" button in the upper right-hand corner of the Web Terminal page to review all the transaction made using your web terminal.
Filter, review, and export your transaction ledger
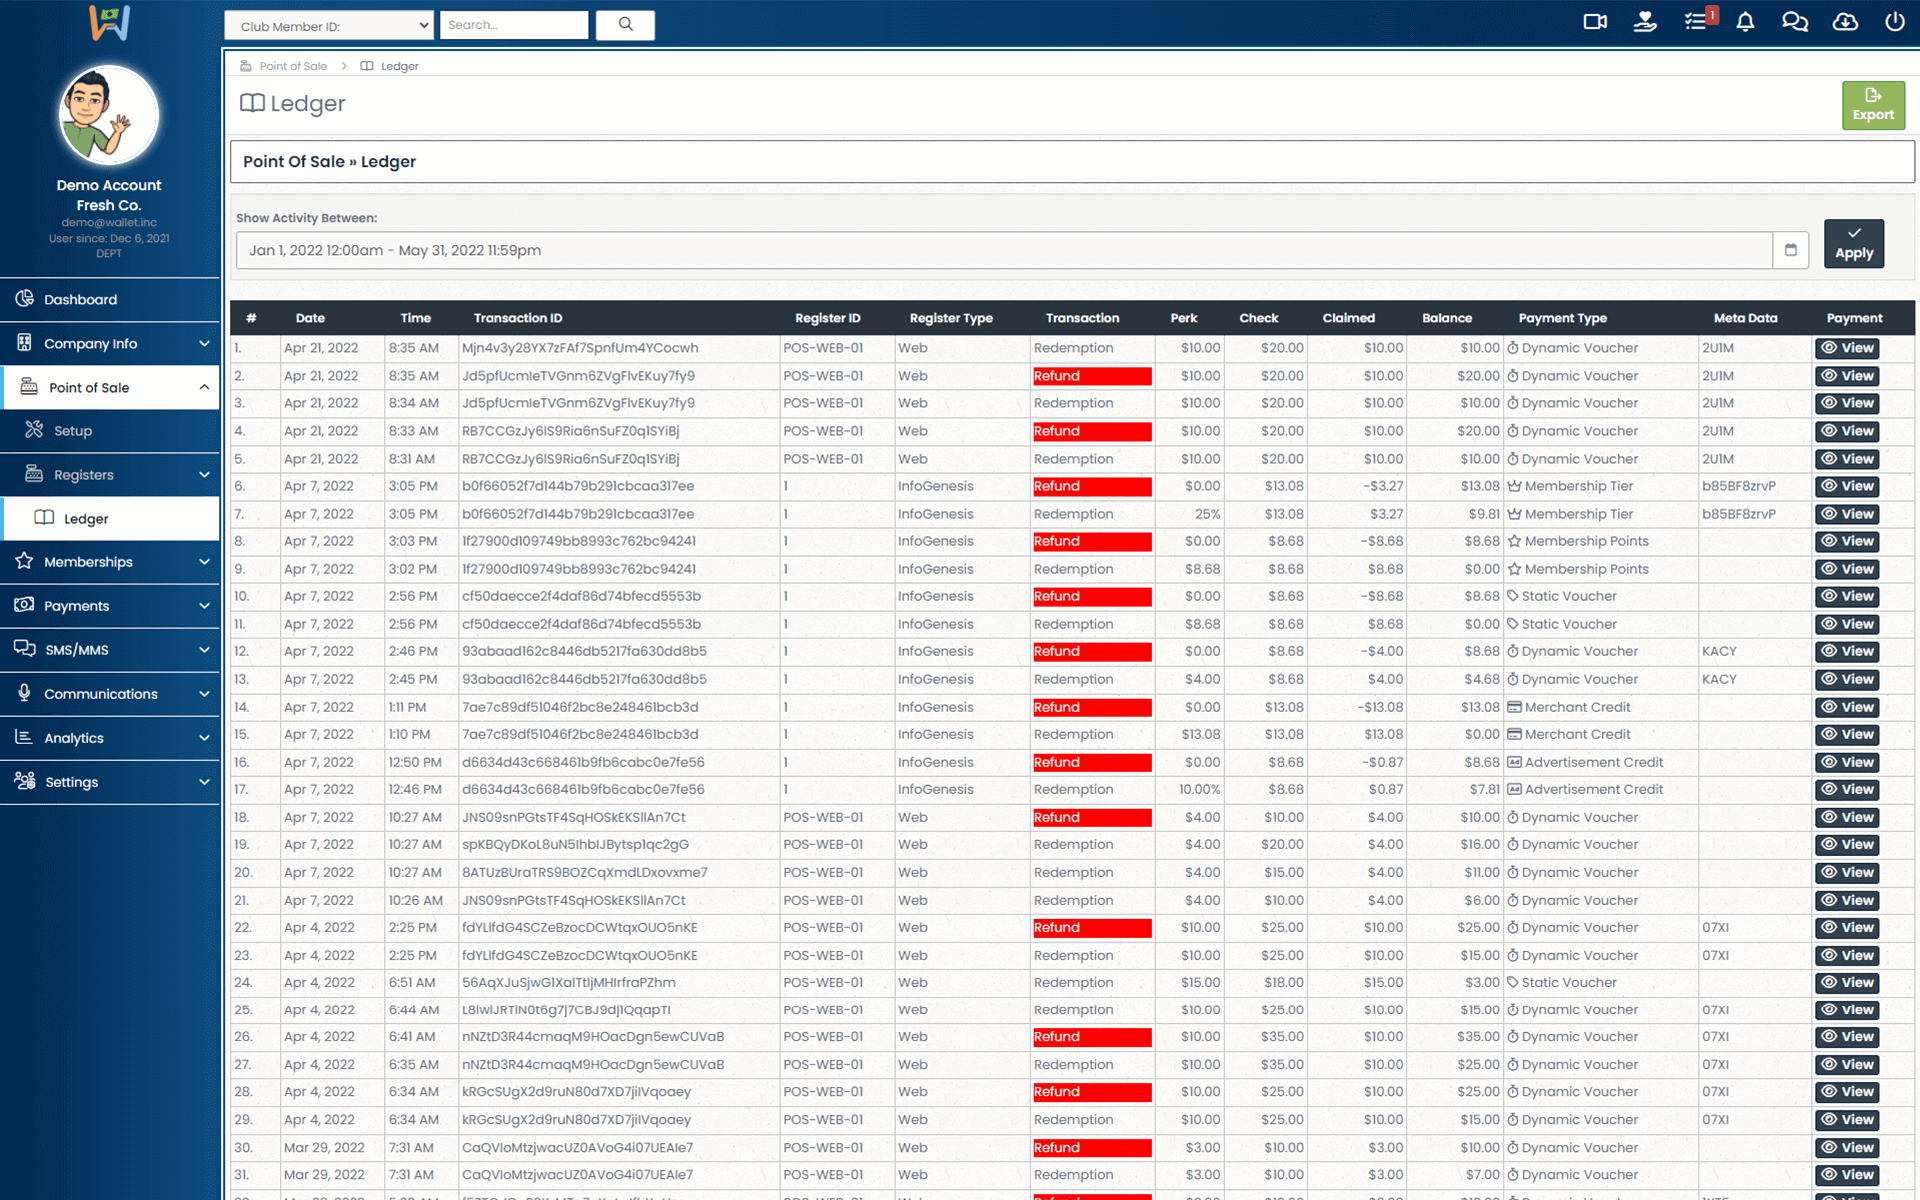
In your Wallet Ledger, you're able to view all transactions that have occurred in a selected window of time.
Choose a timeframe that you wish to review and click apply. You will then see all transactions and relative data for your chosen timeframe. To export your ledger, click the green "Export" button in the upper right-hand corner of your screen.
These reports can be provided to your revenue audit or accounting department to review the transactional ledger and perform periodic reconciliation of accounts.

